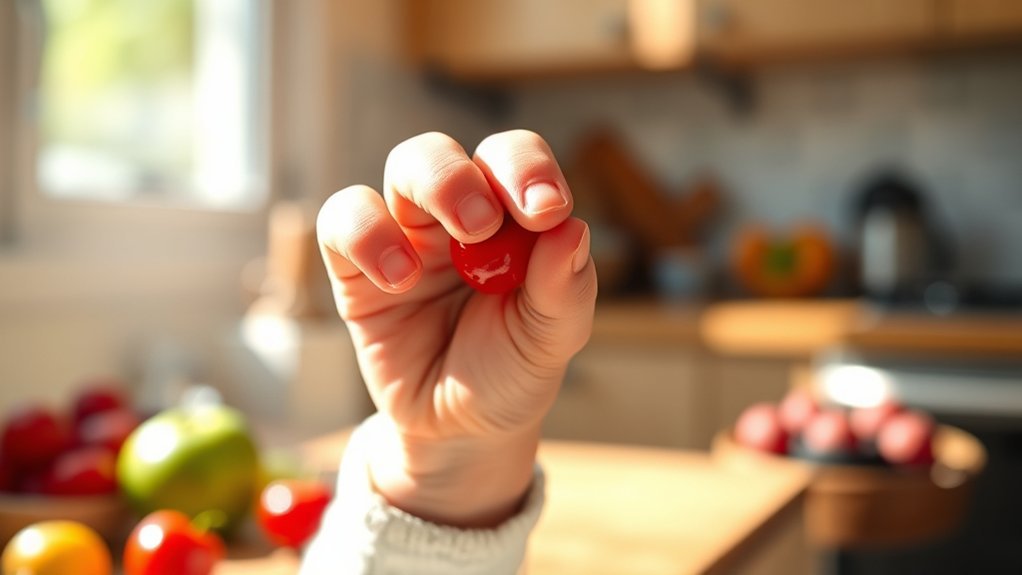
Your baby’s pincer grasp is the small but powerful skill of picking up something between the thumb and pointer finger. It usually develops after months of reaching, raking, transferring toys between hands, and practicing with safe foods and toys. With the right activities, you can support this milestone without forcing it or creating choking risks.
Quick Answer
Most babies develop a mature pincer grasp by about 12 months, after earlier raking and whole-hand grasps. You can encourage it with safe finger foods, chunky knob toys, container play, tape peeling, and short supervised practice. Keep tiny objects and choking-hazard foods out of reach.
Key Takeaways
- The pincer grasp usually becomes clearer between 9 and 12 months, with many babies mastering thumb-and-pointer pickup around 1 year.
- Before a neat pincer grasp, babies often rake food with their fingers, transfer toys between hands, and grab with the whole hand.
- Safe, supervised practice matters because babies explore with their mouths and can choke on small foods, toys, coins, batteries, and loose parts.
- Premature babies should often be viewed by corrected age during the first 2 years, so milestone timing may look different.
- Talk with your child’s pediatrician if your baby loses skills, seems very stiff or floppy, cannot pick up small soft food by around 12 months, or you have any concern.
At a Glance
| Time Required | 3 to 10 minutes per activity, once or twice a day |
| Difficulty | Easy, but requires close supervision |
| Tools Needed | High chair tray, soft finger foods, chunky knob toys, board books, containers, painter’s tape, playdough for older toddlers |
| Cost | Usually $0 to $15 using safe household items and baby-safe toys |
Understanding the Pincer Grasp and Its Importance
The pincer grasp is a fine motor skill that lets your child pick up a small item with the thumb and pointer finger. It helps with self-feeding, turning pages, holding crayons later on, and using both hands for play.
This skill does not appear all at once. Babies usually build toward it in stages:
- Whole-hand grasp: your baby grabs an object with the palm and fingers.
- Raking grasp: your baby uses several fingers to pull food or a toy toward the palm. The CDC’s 9-month milestones include using fingers to rake food and moving items from one hand to the other.
- Inferior pincer grasp: your baby picks up an item using the thumb and the side of the pointer finger.
- Neat pincer grasp: your baby uses the pads of the thumb and pointer finger for a more precise pinch. The CDC’s 1-year milestones include picking up small bits of food between the thumb and pointer finger.
Because the pincer grasp supports feeding and early hand control, it is an important part of fine motor development. It also encourages your baby to explore texture, shape, size, and cause-and-effect through play.
Note: Milestone ages are guides, not strict deadlines. The CDC describes milestones as skills most children, 75% or more, can do by a certain age. If your child was born early, use corrected age when discussing progress with your pediatrician.
Signs Your Child Is Ready to Develop the Pincer Grasp
As your baby moves through the second half of the first year, you may notice signs that the pincer grasp is developing. These signs often show up before your baby can pick up tiny bits of food with perfect control.
- Raking food toward the palm: your baby uses several fingers to drag soft food closer.
- Moving toys between hands: this shows growing coordination between both sides of the body.
- Pointing or poking with one finger: your baby is learning to isolate fingers instead of using the whole hand.
- Interest in self-feeding: your baby reaches for safe finger foods and tries to bring them to the mouth.
- Steadier sitting: better trunk control frees the hands for reaching, grasping, and releasing.
- Trying again after missing: your baby may drop, grab, and retry many times. This is normal practice.
A pincer grasp is not just a finger skill. It depends on posture, vision, hand-eye coordination, safe practice, and many small attempts over time.
Safety First Before Practicing With Small Items
Pincer grasp practice often involves foods or toys your baby wants to pick up. That makes safety essential. Babies and toddlers explore by putting things in their mouths, and small items can become choking hazards.
Warning: Never leave your baby alone with small foods, beads, coins, button batteries, toy parts, marbles, balloons, or any object that could fit fully in the mouth. Avoid high-risk foods such as whole grapes, popcorn, nuts, hard candy, raw carrot sticks, and thick chunks of nut butter unless they are modified in an age-safe way.
The American Academy of Pediatrics’ HealthyChildren choking guidance recommends close supervision, seated eating, safe food preparation, and keeping household choking hazards away from infants and young children.
For food-based practice, use foods your child is already ready for and can manage safely. Soft cooked peas, tiny pieces of ripe banana, small soft pasta pieces, or age-appropriate cereal may work for some babies, but always follow your pediatrician’s feeding advice and your child’s readiness.
Activities to Encourage Pincer Grasp Development
Use short, calm activities that let your child practice without pressure. Stop when your baby turns away, cries, arches, throws everything repeatedly from frustration, or seems tired.
| Activity | How to Do It | Why It Helps |
|---|---|---|
| Safe finger foods | Place one or two soft, age-appropriate pieces on the high chair tray. Let your baby reach, rake, pinch, and try again while seated and supervised. | Builds thumb-pointer control and self-feeding practice. |
| Container play | Give your baby a wide plastic container and chunky baby-safe blocks. Show how to put one block in and take it out. | Supports grasp, release, wrist control, and hand-eye coordination. |
| Painter’s tape peel | Stick a short strip of painter’s tape to a tray with one end folded up. Let your baby pinch and pull the lifted edge. Remove the tape when the activity ends. | Encourages a pinch-and-pull motion without using tiny loose objects. |
| Chunky knob puzzle | Use a large-piece puzzle with oversized knobs. Show your child how to hold the knob and lift the piece. | Strengthens finger control while keeping pieces large enough for safer supervised play. |
| Board book page turns | Lift the corner of a sturdy board book page and let your child pinch or hook a finger under it to turn the page. | Builds finger isolation and early book-handling skills. |
| Playdough pinching | For toddlers who no longer mouth materials, offer a small ball of child-safe playdough and show how to pinch, poke, and roll it. | Builds hand strength and finger separation for later crayon and utensil skills. |
Pro Tip: Put only one or two practice items on the tray at a time. Too many pieces can make your baby rake with the whole hand instead of slowing down to pinch.
Step-by-Step Practice Routine
You do not need long lessons. A few minutes of safe practice during normal play or meals is enough.
- Choose a safe position. Use a high chair for food or sit on the floor with your baby for toy play.
- Offer one item at a time. Start with a soft food piece or a chunky toy your child can see clearly.
- Model the movement. Pick up the item slowly with your own thumb and pointer finger.
- Wait before helping. Give your child time to reach, miss, rake, pinch, and retry.
- Use simple words. Say “pinch,” “pick up,” “in,” “out,” “more,” or “all done.”
- Celebrate effort. Praise trying, not just success.
- End early. Stop while your baby is still interested instead of waiting for frustration.
Tips for Supporting Your Child’s Fine Motor Skills
Fine motor skills grow through everyday routines. You can help by creating safe chances to reach, grasp, release, and explore.
- Offer variety: use soft foods, chunky blocks, textured fabric books, stacking cups, and large knob toys.
- Let your child problem-solve: pause before you fix every dropped toy or missed grab.
- Use both hands: encourage passing a toy from one hand to the other.
- Keep practice playful: sing, name objects, and take turns.
- Avoid pressure: do not force your baby’s fingers into position.
- Rotate toys: fewer choices often lead to better focus.
- Watch for mouthing: if your child still mouths everything, use larger toys instead of loose small items.
Daily routines also help. Let your child try to feed themselves with fingers, hold a spoon with help, turn board book pages, pull socks, or put large toys into a bin. These simple moments build strength and coordination.
Milestones and What to Expect as Your Child Grows
Every child develops at their own pace, but milestone patterns can help you know what to watch for. The CDC recommends tracking development and talking with your child’s doctor if your child is not meeting milestones, has lost skills, or you have concerns.
| Age | Fine Motor Signs to Watch For | How to Support |
|---|---|---|
| Around 6 months | Reaches for toys, brings objects to the mouth, and begins transferring items between hands. | Offer easy-to-grasp rattles, soft blocks, and tummy-time reach games. |
| Around 9 months | May move things from one hand to the other and rake food toward the palm. | Use safe finger foods and container play with close supervision. |
| Around 12 months | Many babies can pick up small bits of food between the thumb and pointer finger. | Offer one safe practice item at a time and encourage self-feeding. |
| Around 18 months | Many toddlers scribble, feed themselves with fingers, and try to use a spoon. | Offer large crayons, spoon practice, and simple pretend play. |
| Around 2 years | Many children hold something in one hand while using the other, try switches or knobs, and eat with a spoon. | Use shape sorters, busy boards with safe parts, board books, and simple dressing practice. |
When to Ask a Pediatrician
One delayed or skipped-looking skill does not always mean something is wrong. Still, it is wise to ask your child’s pediatrician if you notice any of these concerns:
- Your baby is not using both hands or strongly favors one hand before the first birthday.
- Your baby cannot bring hands together, transfer toys, or reach for objects by the expected age range.
- Your baby cannot pick up small soft pieces of food between the thumb and pointer finger around 12 months.
- Your child loses a skill they previously had.
- Your child seems unusually stiff, unusually floppy, or frustrated by most hand-use tasks.
- You have feeding, swallowing, vision, or muscle-tone concerns.
The CDC’s developmental milestone resources can help you track skills, but they do not replace developmental screening or medical care.
Premature Babies and Corrected Age
If your baby was born early, milestone timing may be discussed by corrected age. Corrected age means your baby’s actual age minus the number of weeks they were born early. The American Academy of Pediatrics’ HealthyChildren guide explains that corrected age can give a better idea of developmental expectations during the first 2 years.
For example, if your baby is 10 months old but was born 8 weeks early, their corrected age is about 8 months. In that case, raking and early thumb-finger attempts may fit better than expecting a fully neat pincer grasp right away.
Frequently Asked Questions
What age do most children typically develop the pincer grasp?
Many babies start working toward the pincer grasp between 9 and 12 months. At 9 months, many babies rake food with their fingers. By about 12 months, many can pick up small bits of food between the thumb and pointer finger.
Can premature babies develop the pincer grasp on schedule?
Yes, but “on schedule” may mean by corrected age, not birth age. During the first 2 years, corrected age often gives a more realistic picture of a premature baby’s developmental progress. Ask your pediatrician how to track milestones for your child.
Are there concerns if my child skips the pincer grasp?
Some children may move through grasp patterns quickly, so you might not notice every stage. Still, ask your pediatrician if your child cannot pick up small soft food by around 12 months, loses skills, avoids using one hand, or has feeding or muscle-tone concerns.
How can I tell if my child is struggling with fine motor skills?
Watch for trouble reaching, transferring toys, bringing food to the mouth, using both hands, picking up soft food pieces, turning pages, scribbling, or using utensils at age-appropriate stages. A pediatrician can check whether the pattern fits normal variation or needs support.
What toys are best for encouraging pincer grasp development?
Choose large, baby-safe toys that encourage pinching without creating choking risks. Good options include chunky knob puzzles, stacking cups, large blocks, textured board books, pop-up toys, and containers for putting toys in and taking them out.
Should I give my baby beads or tiny toys for pincer practice?
No. Beads, tiny toys, coins, marbles, button batteries, and toy parts can be choking or swallowing hazards. Use large baby-safe items instead. Save bead stringing for older children who no longer mouth objects and can be closely supervised.
How long should pincer grasp practice last?
Keep practice short. Three to ten minutes during meals or play is enough for many babies. Stop if your child gets tired, upset, or starts putting unsafe items in the mouth.
Conclusion
Supporting your child’s pincer grasp development does not require special lessons. Safe daily practice with soft finger foods, chunky toys, containers, board books, and gentle modeling can build the thumb-and-pointer control your child needs for feeding, play, and later writing skills. Stay patient, supervise closely, and ask your pediatrician if a milestone feels delayed or your child loses a skill.
Sources
- CDC: Milestones by 9 Months — supports raking food, hand-to-hand transfer, safe milestone tracking, and activity guidance.
- CDC: Milestones by 1 Year — supports thumb-and-pointer pickup by around 12 months.
- CDC: Milestones by 18 Months — supports scribbling, finger feeding, and spoon attempts.
- CDC: Milestones by 2 Years — supports two-hand coordination, switches/knobs/buttons, and spoon use.
- HealthyChildren.org: Corrected Age for Preemies — supports using corrected age for premature babies during the first 2 years.
- HealthyChildren.org: Choking Prevention for Babies & Children — supports choking hazard warnings and safe food/object guidance.