
To keep baby gear germ-free, you should wash bottles, nipples, and valves right after use with warm, soapy water, then rinse and air-dry them fully. After cleaning, sterilize with boiling water, steam, or a chemical method, following the product directions. Daily sterilization matters most for babies under 2 months or with weakened immune systems. Store clean items in a dry, covered space, and replace any cracked parts. There’s more to know about getting it right.
What Is Baby Bottle Sterilization?
Baby bottle sterilization is the process of removing harmful bacteria and germs from feeding equipment to help protect infants, especially babies under two months old or those with weakened immune systems.
You use sterilization to give baby bottles extra protection when your baby’s immune system can’t fully defend itself. Common methods include boiling, steam, chemical solutions, and UV devices, each designed to reduce contamination effectively.
If you boil, submerge disassembled bottles and feeding parts in water for five minutes. If you choose chemicals, follow the manufacturers instructions exactly for dilution and immersion time. That precision matters because it helps you avoid weak disinfection or residue.
Sterilization isn’t about fear; it’s about control. You can protect your baby with a simple, evidence-based routine that supports health and peace of mind.
After sterilizing, keep items in a clean, dust-free place so they stay ready and germ-free until you need them for feeding.
Clean Baby Bottles Before Sterilizing
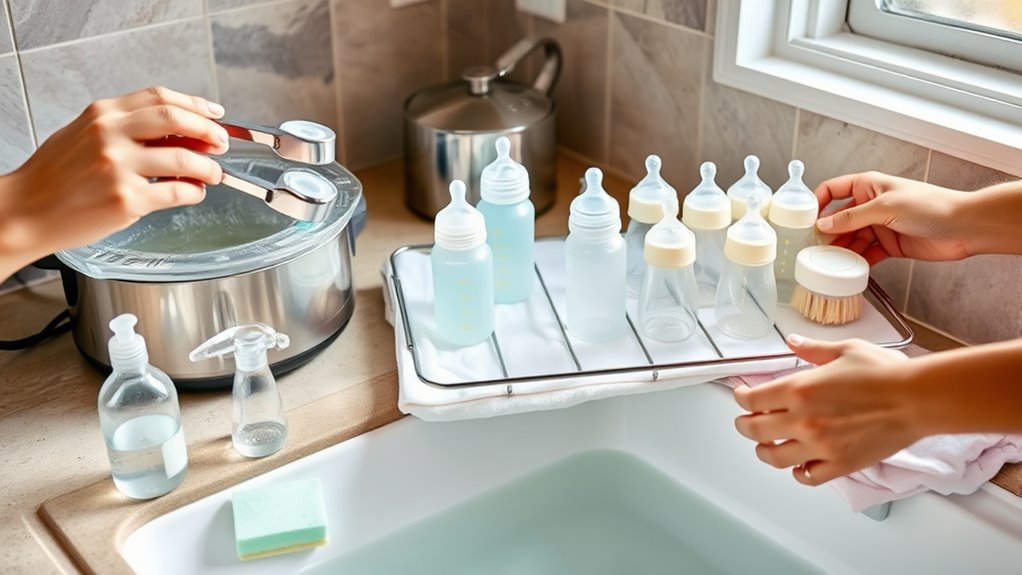
You should wash baby bottles with warm, soapy water right after each use to remove milk residue and limit bacterial growth.
Take the bottles apart and scrub every piece—nipple, cap, and valves—so no formula stays behind, then rinse away all soap.
Let the parts air-dry completely on a clean surface before sterilizing, and discard any cracked or damaged items.
Wash Before Sterilizing
Before sterilizing, always wash baby bottles in warm, soapy water to remove visible milk residue and lower the number of bacteria on the surface.
This wash before sterilizing step gives you control and protects your baby without extra hassle. Use a clean bottle brush to scrub every reachable area, then rinse under running water so no soap remains.
If you can’t wash right away, rinse the bottles with clean water first to keep milk from drying and clinging. You’ll make sterilizing more effective when the bottles are already clean.
Follow the manufacturer’s guidelines for washing and sterilizing, because they’re designed for safe, reliable results.
With this routine, you cut contamination risks and keep baby gear ready with confidence.
Disassemble Bottle Parts
Take apart each baby bottle before cleaning so every surface gets the attention it needs. When you disassemble bottle parts, you give yourself full access to the bottle, nipple, ring, and cap, which helps remove hidden milk residue and supports safer sterilizing.
- Wash your hands well; clean hands lower contamination risk.
- Scrub each piece with a clean bottle brush and warm soapy water.
- Focus on nipples and valves, where buildup can hide.
- Rinse under running water, then sanitize brushes and basins regularly.
You don’t need guesswork or wasteful habits here. This simple routine helps you protect your baby with confidence and keeps your cleaning process efficient.
Skip disinfectant wipes for bottle cleaning; they aren’t a substitute for proper washing. Afterward, let parts air dry completely before sterilizing.
Air-Dry After Cleaning
After washing, let baby bottles air-dry completely on a clean surface so lingering moisture doesn’t give bacteria a place to grow during storage.
You’ll protect your baby’s feeding gear by skipping dish towels, which can transfer germs and undo your work.
Place nipples, caps, and bottle pieces where air can reach every edge, and make sure each part is fully dry before sterilization.
If you use a drying rack, keep it reserved for infant items and sanitize it regularly.
This simple habit helps clean gear stay safe, supports effective sterilization, and can even prevent mold that shortens bottle life.
When you let bottles dry on their own, you keep control, reduce risk, and create a healthier routine without extra fuss.
How to Sterilize Baby Bottles Safely
To sterilize baby bottles safely, start by washing every disassembled part with soap and water to remove milk residue and bacteria.
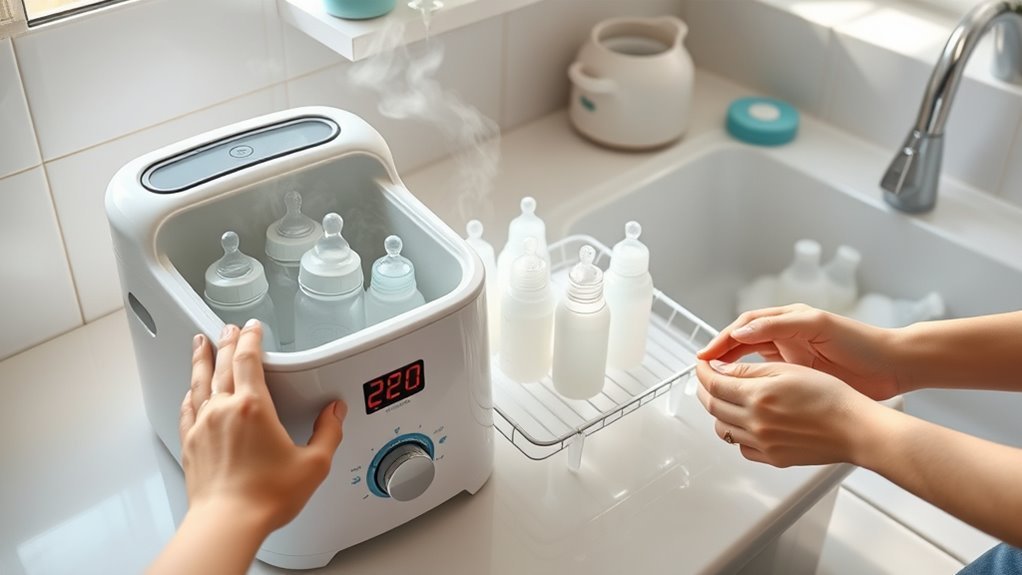
Then choose a sterilization method that fits your routine: boiling the bottles for 5 minutes can kill 99.9% of bacteria, a steam sterilizer works quickly when you follow the manufacturer’s directions, and chemical sterilization can also be effective if you keep all parts fully submerged and don’t rinse them afterward.
You’re not stuck with one method; pick the one that gives you confidence and control.
- Boiling method: reliable and simple
- Steam sterilization: fast and convenient
- Chemical sterilization: effective when used correctly
- Clean before sterilization: always essential
After sterilization, let the baby bottles air-dry completely in a clean, dust-free place.
That last step helps keep them germ-free without extra effort.
When to Sterilize Baby Bottles Daily
When should you sterilize baby bottles every day? You should do it daily for infants under 2 months, because their immune systems can’t yet defend well against germs.
You should also use daily sterilization for babies with weakened immune systems, where extra protection matters.
First, wash the baby bottles with warm soapy water to clear away milk residue and bacteria. Then sterilize using boiling, steaming, or a chemical method made for baby items.
This routine gives you evidence-based protection without making care feel complicated or controlling.
After sterilization, let the bottles air-dry completely in a clean area so you don’t invite new contamination.
Dry and Store Sterilized Bottles
Once your baby bottles are sterilized, let every part air-dry completely on a clean surface, since leftover moisture can give bacteria and mold a place to grow.
Keep nipples, caps, and rings separated until they’re fully dry, then reassemble them with clean hands. You’ll protect your baby and keep germs from getting a foothold.
- Dry sterilized bottles on a fresh rack or clean counter, not a towel.
- Store them in a closed, dust-free cabinet reserved for clean items.
- Recheck that every piece is dry before you put bottles away.
- Inspect stored bottles regularly for wear or damage before use.
When you store sterilized bottles this way, you create a simple, reliable system that supports your freedom to care with confidence.
Clean, dry, and protected from dust, these bottles stay ready for the next feeding without inviting germs back in.
Avoid Common Sterilizing Mistakes
You need to clean baby gear thoroughly before sterilizing it, because visible dirt and residue can shield germs and reduce effectiveness.
After sterilization, let items air-dry completely and don’t reuse them while they’re still wet, since moisture can reintroduce contamination.
Skipping Proper Cleaning
Before sterilizing baby gear, wash it thoroughly with soap and water, then rinse well, because leftover dirt or soap can reduce how well the sterilizing step works. You protect your baby best when you clean first, then disinfect. Skipping this step lets residues block sterilization and may leave germs behind.
- Wash visibly dirty items right away.
- Rinse off every trace of soap.
- Disassemble parts so each surface gets exposed.
- Replace damaged gear; wear can trap bacteria.
Whether you steam, boil, or use a chemical method, proper prep helps sterilization work as intended. You don’t need perfection—just a clear process that keeps your routine safe, efficient, and freeing.
Reusing Wet Items
Wet baby gear shouldn’t be reused or sterilized while it’s still damp, because moisture can help bacteria and mold grow and can also weaken the sterilizing step.
When you’re reusing wet items, you need to wash and dry them fully before they go back into service. Clean cleaning items right after use; if you can’t, rinse them under running water to lower contamination.
Don’t tuck damp gear into bins or bags, where bacterial growth thrives. Let everything stay fully air-dried in open air so moisture can’t linger.
Never sterilize a wet bottle, nipple, or pump part, since water can dilute the solution and cut its power.
Check each item for cracks, wear, or damage, because compromised gear can’t be reliably sanitized.
Frequently Asked Questions
How to Store Baby Items Once Sterilised?
Store sterilised baby items in clean, dust-free storage solutions, like closed cabinets or airtight containers, after air-drying. Use humidity control, labeling systems, and cleaning schedules to keep everything safe, organised, and ready for use.
What Is the 3 6 9 Rule for Babies?
Like a lighthouse, the 3 6 9 rule guides you: at 3 months, baby lifts head; 6, sits with support; 9, crawls. Watch baby health, choose sterilization methods, practice germ prevention, support baby safety, skip harsh cleaning supplies.
How to Disinfect Baby Gear?
You can disinfect baby gear with diluted bleach or an EPA-registered disinfectant, then rinse well. For Baby bottle sterilization, Toy cleaning methods, High chair hygiene, Pacifier sanitization, and Playmat care, follow labels and dry fully.
How to Keep Sterilized Baby Bottles Sterile?
Keep sterilized baby bottles sterile by air-drying fully, then sealing them in a clean cabinet; use safe handling practices, effective cleaning techniques, and bottle sterilization methods, and ignore common sterilization myths and poor sterilization timing tips.
Conclusion
When you sterilize baby bottles the right way, you give your baby a safer start and your routine more confidence. Clean first, sterilize safely, and dry and store everything properly. It’s worth the effort: the CDC notes that infants under 3 months are at highest risk for serious infection. So stick to the basics, avoid common mistakes, and you’ll keep bottle prep simple, steady, and germ-free.