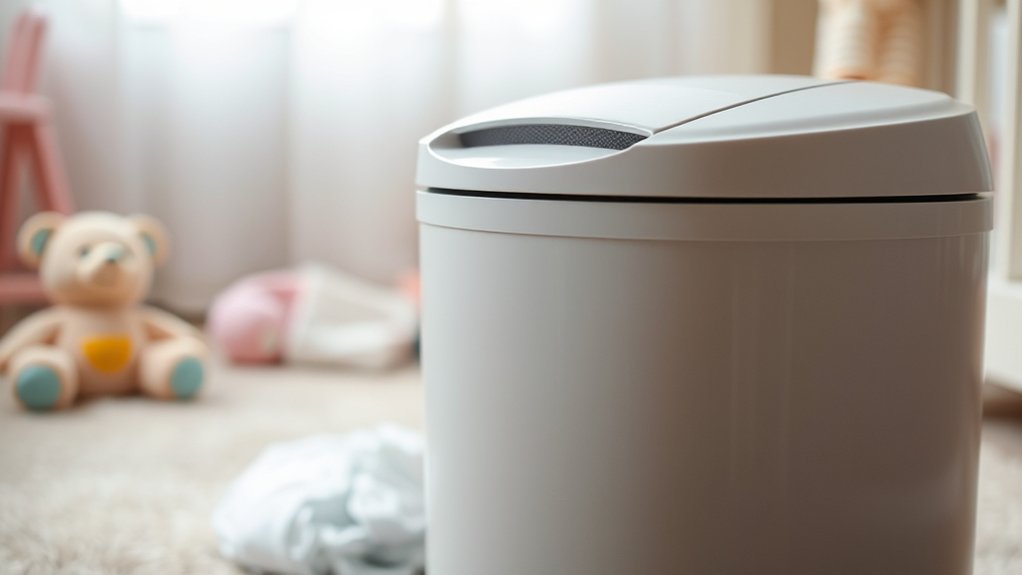
A diaper pail should trap odors, hold used diapers securely, and make changes cleaner and easier. If yours smells even when closed, will not latch, clogs often, leaks residue, or needs constant bag changes, it may need more than a quick wipe. In many cases, you can fix the problem with deep cleaning, a new seal, the right refill bags, or a filter change. If the plastic is cracked, the lid is warped, or odors have soaked into the material, replacement is usually the better choice.
Quick Answer
Your diaper pail likely needs repair or replacement if odors escape after cleaning, the lid or seal no longer closes tightly, bags slip or tear, clogs happen often, residue keeps building up, or the plastic is cracked, warped, rusty, or permanently stained.
Key Takeaways
- A diaper pail that smells after a deep clean often has a worn seal, poor bag fit, trapped residue, or odor absorbed into the plastic.
- Lid, hinge, foot pedal, gasket, and cartridge problems are usually repair signs before they become replacement signs.
- Cracks, rust, warped plastic, moldy seams, and unavailable refill parts usually mean replacement is safer and more practical.
- Clean first with soap and water, dry fully, and use disinfectant only when needed and according to the product label.
At a Glance
| Time Required | 10 minutes for a quick inspection; 20–30 minutes for deep cleaning and drying time |
| Difficulty | Easy for cleaning and bag-fit checks; moderate if replacing seals, filters, hinges, or a foot pedal |
| Tools Needed | Mild dish soap, warm water, soft brush, microfiber cloth, paper towels, gloves, replacement bags or refills, and optional baking soda or activated charcoal |
| Cost | Usually low for cleaning supplies, filters, or refills; higher if the full pail must be replaced |
Foul Odors Persisting Despite Sealing
If foul odors escape even when the diaper pail is closed, start by checking the seal, bag fit, lid alignment, and interior surfaces. A good diaper pail should not smell strongly between bag changes when it is clean, dry, and closed correctly.
Odor often comes from residue on the inner wall, lid channel, bag clamp, foot-pedal opening, or underside of the lid. Moisture can also sit in seams and encourage sour smells. This matters because diaper waste is not just unpleasant. The CDC notes that even a tiny amount of poop can contain millions of germs, so a diaper pail should support clean disposal habits, not make the changing area harder to keep fresh.
If odor returns within a few hours of cleaning, suspect the seal, lid fit, refill bag, or plastic itself rather than the diapers alone.
To troubleshoot, empty the pail, wash it with warm soapy water, scrub around the lid and gasket, rinse, and dry it completely before adding a new bag. If the pail uses a carbon filter, deodorizer, cartridge, or gasket, check whether that part is expired, warped, cracked, or missing.
Pro Tip: Let the pail air-dry fully before inserting a new bag. Trapped moisture under the bag rim or lid seal is one of the easiest ways for odor to come back quickly.
Difficulty in Closing the Lid
A lid that will not close properly is one of the clearest signs that the diaper pail needs attention. Even a small gap can let odor escape and allow the bag to shift out of place.
Common causes include a misaligned lid, stretched hinge, sticky latch, overfilled bag, twisted refill ring, or dried residue around the rim. If the lid worked well before and suddenly resists closing, remove the bag and inspect the rim before assuming the pail is broken.
Try these quick checks:
- Look at the seal: A flattened, cracked, or loose gasket cannot hold odor well.
- Check the hinge: If it wobbles or lifts unevenly, the lid may not sit flush.
- Inspect the latch: Sticky residue can stop a latch from catching.
- Test without a bag: If the lid closes empty but not with a bag, the bag or cartridge may be installed wrong.
If cleaning and correct bag placement fix the lid, you can keep using the pail. If the hinge is broken, the lid is warped, or the latch no longer catches, repair the part if replacements are available. If not, replace the pail.
Clean, Repair, or Replace the Diaper Pail?
The fastest way to decide what to do is to separate cleaning problems from mechanical problems. Odor from fresh residue is usually fixable. Odor from cracked plastic, a broken seal, or a warped lid is harder to solve.
| Problem | Best First Step | Replace If |
|---|---|---|
| Odor after normal use | Empty, wash, dry, change bag, check filter | Smell returns right after deep cleaning |
| Lid will not close | Remove overfilled bag and clean latch | Hinge, latch, or lid is cracked or warped |
| Bag slips or tears | Use correct refill or better-fitting liner | Bag holder or cartridge ring is broken |
| Residue in seams | Scrub seams with soap and water | Residue is trapped in cracks you cannot clean |
| Rust or sharp edges | Stop using until inspected | Metal parts are corroded, sharp, or unstable |
Visible Wear and Tear
Visible damage is more than an appearance issue. Cracks, deep scratches, rust, warped plastic, loose handles, and torn seals can trap residue and prevent the pail from closing tightly.
| Sign of Wear | What It Means | Action Needed |
|---|---|---|
| Cracks in the body | Residue and odor can collect inside gaps | Replace the pail |
| Worn-out seals | Odor escapes even when the lid is shut | Replace the seal if available |
| Deep scratches inside | The surface is harder to clean fully | Deep clean; replace if odor stays |
| Rust on metal parts | The pedal, hinge, or fastener may fail | Repair only if parts are safe and replaceable |
| Faded, rough, or brittle plastic | Age or cleaning chemicals may have weakened the material | Replace if it flakes, cracks, or holds odor |
If the pail has sharp edges, unstable parts, or cracks that you cannot clean, stop using it for diaper disposal and replace it.
Frequent Clogs or Blockages
Frequent clogs or blockages usually mean the pail is overfilled, the bag is installed incorrectly, the diaper opening is too small for your current diaper size, or residue is catching on the internal mechanism.
Do not force diapers through a stuck opening. That can tear the bag, smear residue inside the mechanism, or damage the lid. Empty the pail before it is packed tight, especially if you are disposing of larger overnight diapers or multiple stool diapers.
For disposable diapers, the CDC recommends placing used diapers and wipes in a plastic-lined, lidded trash can. A diaper pail can meet that need only if the bag stays lined correctly and the lid closes securely.
To reduce clogs:
- Do not push diapers past the fill line.
- Fold or roll diapers tightly before disposal.
- Use the refill size made for your pail if the model depends on a cartridge or clamp.
- Clean the chute, inner ring, lid channel, and bag cutter if your pail has one.
- Replace worn refill rings or bag holders if the bag keeps slipping.
Inability to Contain Odors
If your diaper pail cannot contain odors, look beyond the bag. Odor control depends on four things working together: a tight lid, a good seal, a correctly fitted bag, and a clean interior.
A pail can lose odor control when the gasket flattens, the lid warps, the hinge loosens, the filter is saturated, or the plastic has absorbed odor after months of use. Some plastic pails also hold smell more than metal pails, especially if they are not dried after cleaning.
Try this order before replacing the whole pail:
- Empty the bag and remove loose debris.
- Wash the pail with warm water and mild dish soap.
- Scrub the underside of the lid, seal, rim, pedal opening, and bag ring.
- Rinse and dry completely.
- Add a fresh bag or correct refill.
- Replace the filter or deodorizer if your model uses one.
- Close the lid and check for gaps around the rim.
If odor still escapes when the pail is empty, clean, dry, and closed, the seal or plastic may be the problem.
Safe Cleaning and Disinfecting Routine
Start with cleaning, not heavy disinfecting. The CDC explains that cleaning with water, soap, and scrubbing removes germs, dirt, and impurities, while sanitizing or disinfecting is usually only needed in certain situations, such as when someone is sick or a surface has been contaminated.
For a diaper pail, a practical routine is:
- Empty the pail: Tie off and remove the used bag.
- Remove loose residue: Wipe visible soil with a paper towel or disposable wipe.
- Wash: Scrub the inside, rim, lid, seal, and pedal area with warm water and mild dish soap.
- Rinse: Remove soap film so it does not trap odor.
- Dry: Leave the lid open until every seam is dry.
- Deodorize if needed: Use baking soda or activated charcoal near the pail, not loose inside a mechanism where it can clump.
- Disinfect only when needed: If diaper contents leaked onto hard surfaces, use a disinfectant that is safe for that material and follow the label.
Warning: Never mix bleach with vinegar, ammonia, or other cleaners. If you use bleach or another disinfectant, follow the label, use good ventilation, keep chemicals away from children and pets, and let the surface stay wet for the required contact time.
If you choose bleach for a hard, bleach-safe surface, follow the CDC’s bleach safety guidance, including proper dilution, ventilation, and daily replacement of diluted bleach solutions.
Accumulation of Residue
Residue buildup inside a diaper pail can make a clean bag smell dirty. Sticky film often collects on the lid channel, seal, bag clamp, hinge area, or bottom corners. If the pail has a twisting or sealing mechanism, residue can also collect where the diaper passes through.
| Frequency | What to Do | Focus Areas |
|---|---|---|
| Every bag change | Check for leaks and wipe visible residue | Rim, lid, bottom, bag holder |
| Weekly | Wash with warm water and mild soap | Interior walls, lid underside, seal |
| Monthly | Inspect parts and deep clean seams | Hinge, pedal, gasket, cartridge ring |
If residue is trapped inside a crack, under a non-removable gasket, or in a mechanism you cannot safely clean, the pail may no longer be hygienic enough for regular use.
Excessive Noise During Use
A diaper pail does not need to be silent, but grinding, squeaking, rattling, or snapping sounds can mean a part is worn or misaligned. Noise also matters during late-night diaper changes when you want the room calm and the baby settled.
Common Noise Causes
The most common noise causes include:
- Dry or sticky hinges: Residue or friction can make the lid squeak.
- Loose pedal parts: A foot pedal can rattle if the internal spring or hinge is worn.
- Misaligned lid: A lid that lands off-center may snap or scrape.
- Hard floor vibration: A lightweight pail can knock against tile or wood flooring.
- Overfilled bag: A packed bag can push against the lid and make the mechanism strain.
Solutions for Quiet Operation
Empty the pail first, then check whether the sound remains. Clean the hinge and latch area with a damp cloth, dry it, and inspect the moving parts. If the pail sits on a hard floor, place a washable mat underneath to reduce vibration.
Do not apply random oils, sprays, or lubricants inside the diaper opening unless the manufacturer allows it. Some products can damage plastic, leave residue, or transfer onto bags. If the hinge or pedal is cracked, replacement is safer than forcing it to keep working.
Unpleasant Appearance
An unpleasant-looking diaper pail is not always a reason to replace it. Faded color or small exterior scuffs may be cosmetic. The bigger concern is whether the pail has damage that affects cleaning, sealing, or safe use.
Look closely for:
- Deep interior scratches: These can hold residue and odor.
- Cloudy or rough plastic: Harsh cleaners may have damaged the surface.
- Stains around seams: Staining can point to old leaks or trapped residue.
- Rust on metal parts: Rust can weaken hinges, pedals, or fasteners.
- Mold-like spots: If spots remain after cleaning, the pail may need replacement.
If the pail looks worn but still closes tightly, cleans easily, and holds odor, it may be fine. If it looks worn because the material is breaking down, replace it.
Incompatibility With New Diaper Sizes
As your baby grows, larger diapers can expose problems that were not obvious during the newborn stage. Bigger diapers fill the pail faster, press harder against the lid, and may not pass smoothly through small openings.
Size Compatibility Issues
Your diaper pail may no longer fit your routine if you notice:
- Overflowing before normal bag-change time: Larger diapers take up more space.
- Difficulty closing the lid: The pail may be overfilled or the opening may be too small.
- Diapers catching in the chute: The disposal opening may not work well for larger or overnight diapers.
- Bag tears: The bag may be too tight for the volume of waste.
If the pail is otherwise clean and functional, changing bags more often may solve the issue. If the opening is too small for your daily diaper size, a larger pail may be more practical.
Odor Control Limitations
Larger diapers can create stronger odor simply because there is more waste in the pail. If odor problems started after a diaper-size change, the pail may be filling too full between bag changes.
| Odor Control Step | Best Use |
|---|---|
| Change bags sooner | Best when diapers are larger or stool diapers are frequent |
| Use the correct refill | Best when odor leaks around the bag ring or cartridge |
| Replace filter or deodorizer | Best for models with built-in odor inserts |
| Deep clean and dry | Best when odor remains after the bag is removed |
Frequent Bag Changes
Frequent bag changes are not always a defect. They may simply mean your baby is using larger diapers, your household has more than one child in diapers, or the pail is small. Still, if bags need changing every day because the lid will not close, the pail may no longer match your needs.
Also check whether regular trash bags are bypassing the pail’s seal. Some diaper pails are designed around proprietary refill rings or cartridges. A loose bag may look like it fits but still leave gaps where odor escapes.
Cloth Diaper Pails vs Disposable Diaper Pails
Cloth diaper systems and disposable diaper systems need different pail habits. A disposable diaper pail mainly needs a tight liner, odor seal, and clean lid. A cloth diaper pail may also need a washable liner, airflow control, and a routine that prevents ammonia smell before wash day.
If you use cloth diapers, do not let a diaper pail become a long-term storage bin. Follow your cloth diaper brand’s washing guidance, remove solids as directed, and wash the liner often. If the pail holds ammonia odor even after washing and drying, the material may have absorbed smell.
Note: Compostable or biodegradable liners are not automatically suitable for every diaper pail or local waste program. Check the liner label and your local disposal rules before relying on environmental claims.
When Diaper Pail Problems Affect Hygiene
A broken diaper pail can make diaper changes messier. If the lid sticks, the bag tears, or the pail is hard to open with one hand, you may touch more surfaces during a change. That can make cleanup harder.
The CDC’s home diapering steps include keeping dirty diapers away from surfaces that cannot be easily cleaned, placing used disposable diapers and wipes in a plastic-lined, lidded trash can, cleaning the diapering surface after spills or leaks, and washing hands after diapering. A diaper pail that leaks, overflows, or will not close works against those habits.
Also watch your baby’s skin. The American Academy of Pediatrics notes through HealthyChildren.org that frequent diaper changes and gentle cleaning help reduce contact with urine and stool. If diaper pail problems make changes slower or messier, fix the pail so diaper changes stay quick and clean.
Frequently Asked Questions
How often should I change the bag in my diaper pail?
Change the bag every 3 to 7 days as a general rule, or sooner if the pail is full, a stool diaper smells strong, the room is warm, or the lid will not close easily. Larger diapers and multiple children in diapers usually mean more frequent bag changes.
Can I use regular trash bags in my diaper pail?
You can use regular trash bags only if they fit tightly and do not interfere with the lid, clamp, cartridge, or odor seal. If the bag slips, bunches, tears, or leaves gaps around the rim, use the refill style made for your pail.
What materials are best for reducing diaper pail odors?
A tight gasket, well-fitting liner, dry interior, carbon filter, baking soda, or activated charcoal can help reduce odor. Baking soda and charcoal help absorb smells, but they do not replace washing the pail with soap and water.
Are there eco-friendly diaper pail options available?
Yes, but choose carefully. Look for durable pails with replaceable parts, washable liners for cloth diaper systems, and refill options that reduce excess plastic. If a liner claims to be compostable or biodegradable, check your local waste rules because many programs do not accept diaper waste or mixed plastic liners.
How can I clean my diaper pail effectively?
Empty it, remove loose residue, wash the inside and lid with warm water and mild dish soap, rinse, and let it dry fully before adding a new bag. Clean the seal, rim, hinge, and pedal area. Use disinfectant only when needed and follow the product label.
When should I replace a diaper pail instead of cleaning it again?
Replace it if the plastic is cracked or warped, the lid cannot seal, the hinge or pedal is broken, rust is spreading, odor remains after deep cleaning, or replacement seals, filters, refills, or cartridges are no longer available.
Conclusion
A diaper pail should make diaper changes easier, cleaner, and less smelly. If yours has a temporary odor, a loose bag, or mild residue, a deep clean and the right refill may solve the problem. If it has a broken lid, failed seal, cracked body, rusted part, constant clogs, or odor that returns right after cleaning, it is probably time to repair or replace it. A reliable pail supports a fresher nursery and a smoother diaper-changing routine.
Sources
- CDC — Diaper Hygiene — supports germ-risk and safe diapering context.
- CDC — Diaper Changing Steps at Home — supports lidded trash can disposal, cleaning diapering surfaces, and handwashing.
- CDC — When and How to Clean and Disinfect Your Home — supports cleaning-first guidance and safe use of disinfectants.
- CDC — Cleaning and Disinfecting with Bleach — supports bleach dilution, ventilation, contact time, and chemical-mixing warnings.
- HealthyChildren.org by the American Academy of Pediatrics — Common Diaper Rashes & Treatments — supports frequent diaper changes, gentle cleaning, and when to call a pediatrician.