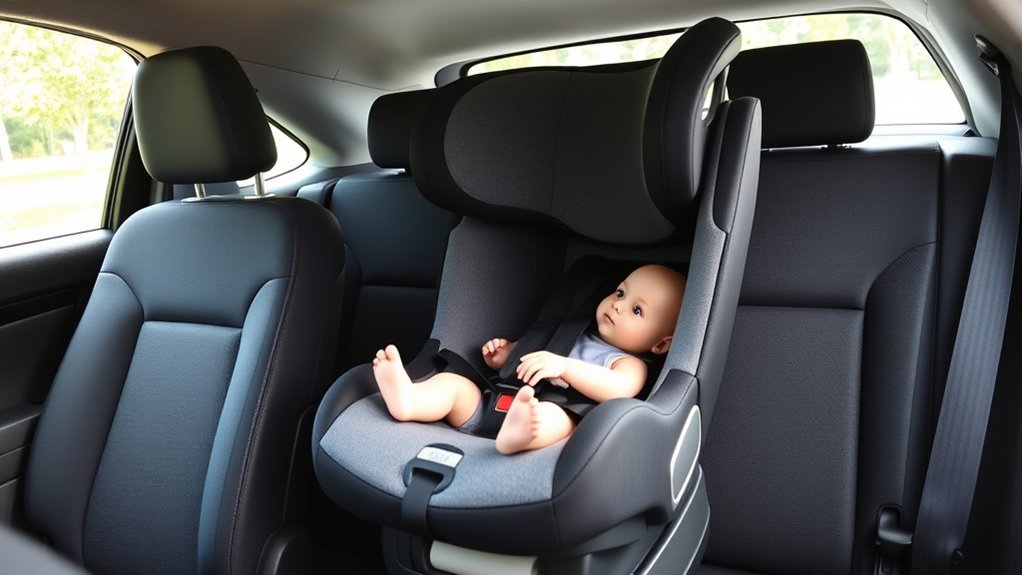
A rear-facing car seat can look secure and still be too upright for a young baby. The correct infant car seat recline angle matters because newborns have limited head control and can slump forward if the seat is positioned incorrectly. Use your seat’s built-in indicator and instruction manual rather than judging the angle by eye.
Quick Answer
For a newborn, use the more reclined position approved by your specific car seat, often near 45 degrees. Do not force every seat to exactly 45 degrees. The correct final setting is the zone, line, or position specified by the car seat’s recline indicator and instruction manual.
Key Takeaways
- Park on level ground before judging a bubble, line, ball, or mechanical recline indicator.
- Recheck the indicator after tightening the seat because installation pressure can change the final angle.
- A newborn generally needs a more reclined approved position than a child with stronger head and neck control.
- Use a rolled towel or pool noodle only when the instructions for your exact seat and installation method allow it.
- After installation, test the seat at the belt path; it should not move more than 1 inch side to side or front to back.
What Recline Angle Is Safe for Infant Car Seats?

The safest recline is the manufacturer-approved rear-facing angle for your exact seat and child. About 45 degrees is commonly used as a newborn reference, but it is not a universal setting that overrides the car seat’s indicator or manual.
The American Academy of Pediatrics describes a properly installed infant restraint as being approximately 45 degrees in its Child Passenger Safety guidance. That semireclined position helps a young infant’s head rest against the seat instead of falling forward and compromising the airway.
However, car seats are designed differently. Some have one approved rear-facing zone, while others provide different allowed positions based on the child’s size, development, or mode of use. Your seat’s indicator and manual therefore take priority over a generic angle measurement.
If the seat is too upright for a young baby, the head may fall forward. Going farther back than the manufacturer’s approved range is not safer either. Keep the indicator within its specified zone and make adjustments only in ways the manufacturer permits.
Also check the baby’s position after installation. The back and bottom should rest against the car seat, and the head should not repeatedly slump forward into a chin-to-chest position.
How to Read a Car Seat Recline Indicator?
Read the car seat recline indicator only after identifying the correct rear-facing range for your child in the instruction manual. The marker may be a bubble, line, ball, bead, color zone, or mechanical pointer, and similar-looking indicators do not always use the same rules.
- Park on level ground. A sloped driveway or parking space can change what the indicator shows.
- Find the correct indicator. Some seats place it on the base, while others place it on the carrier or shell.
- Check the child-specific instructions. If your seat provides more than one approved range, use the range specified for your child’s size or developmental stage.
- Adjust the built-in recline mechanism first. Use the foot, base setting, or other adjustment method described in the manual.
- Install and tighten the seat fully. Then read the indicator again because the angle can change while you tighten the seat.
- Test the installation at the belt path. The NHTSA rear-facing installation guidance says the seat should not move more than 1 inch side to side or front to back at the belt path.
Do not try to make a bubble look perfectly centered unless your manual specifically requires that. The goal is to meet the markings and instructions for your particular restraint.
How Bubble, Line, Wheel, and Ball Indicators Work?
Bubble, line, wheel, and ball-style indicators all serve the same purpose: they show whether the rear-facing seat is within its approved recline range. What counts as correct depends on the design, so read the markings and the seat manual together.
Bubble Level Indicators
A bubble level indicator uses a small air bubble inside a liquid-filled window. The bubble may need to sit between two markings, within a colored area, or at another location specified by the manufacturer.
Do not assume that the bubble must always be exactly in the center. Instead, install the seat on level ground, tighten it, and confirm that the bubble remains inside the approved area shown for your child.
- Set the seat or base on the vehicle seat as instructed.
- Use the built-in recline adjustment to reach the approved range.
- Secure the seat completely.
- Read the bubble again after tightening.
If tightening pulls the bubble outside the permitted zone, reinstall or adjust the recline using a method allowed by the manual.
Line, Wheel, And Ball Indicators
Line indicators commonly require a marked reference line to be level with the ground. Because the vehicle needs to be level for that comparison to mean anything, check the line on a reasonably flat surface.
A wheel or other mechanical indicator uses a pointer or moving marker that must land inside the manufacturer’s approved area. Read it straight on if the manual instructs you to do so rather than from an angle.
Ball or bead indicators work in a similar way: gravity moves the ball into a marked range. Some restraints provide different zones, so use the zone assigned to your child rather than choosing one simply because it appears more reclined.
The important rule is consistency: use the indicator exactly as designed. Do not substitute a phone angle app or visual estimate for a functioning manufacturer-provided indicator unless the seat’s instructions specifically direct you to measure the angle another way.
Newborn Recline vs. Older Baby Position?
A newborn generally needs the more reclined approved rear-facing position because head and neck control are limited. As a baby develops better head control, some car seats allow a more upright rear-facing position, but there is no universal age or 30-degree rule that applies to every model.
| Child or Situation | Recline Approach | What to Check |
|---|---|---|
| Newborn or young infant with limited head control | Use the more reclined position permitted for that child | Head stays back and indicator remains in the approved range |
| Older infant with stronger head and neck control | A more upright rear-facing setting may be allowed | Manual, child-specific indicator range, and stable head position |
| Any rear-facing child | Stay within the seat’s approved rear-facing range | Correct installation, recline indicator, and rear-facing size limits |
Do not change the angle simply because the baby reaches a certain birthday. Development, child size, the restraint design, and the manufacturer’s instructions matter more than an arbitrary age cutoff.
Likewise, do not intentionally make an older baby more upright than the seat permits just to create front-seat space. The indicator still needs to remain in the allowed range.
How to Adjust Car Seat Recline With Noodles or Towels?
You may use a tightly rolled towel or pool noodle to change the recline only if the manual for your exact car seat and installation method permits it. Some restraints allow this technique, while others prohibit it or restrict exactly where and how the support can be placed.
Warning: Never place a towel, noodle, pillow, or other improvised padding behind or underneath your baby to fix the whole seat’s recline. Any support used beneath the car seat must be specifically permitted and positioned exactly as the car seat manufacturer instructs.
Do not rely on a brand-wide rule. Instructions can differ between models and installation modes. For example, the Chicco Fit3x manual specifically says not to use a pool noodle or towel to raise that car seat. Always check the exact Chicco or Diono manual you have rather than assuming every seat from the same brand follows one rule.
If your manual does permit a towel or noodle, use this sequence:
- Park on level ground. Set up the vehicle where the indicator can give an accurate reading.
- Read both manuals first. Confirm the car seat permits the method and check your vehicle manual for installation restrictions.
- Try the built-in recline adjustment. Use the manufacturer’s recline foot or other adjustment before adding anything unless your manual says otherwise.
- Position the support exactly as instructed. A permitted towel should be tightly rolled, and a noodle should be placed only in the location specified by the car seat manufacturer.
- Reinstall and tighten the seat. Secure it with the approved seat-belt or lower-anchor method for that seating position.
- Check the indicator again. The final marker must stay within the correct range for the child.
- Test at the belt path. Confirm the seat does not move more than 1 inch side to side or front to back.
If you cannot reach the approved recline range after following the manual, do not keep stacking or improvising supports. Try another approved vehicle seating position if permitted, contact the car seat manufacturer, or have the installation checked by a qualified technician.
When to Ask an Expert to Check the Seat?
Ask a Certified Child Passenger Safety Technician to check the installation whenever you cannot confidently keep the seat within its approved recline range. Hands-on help is especially useful when the vehicle seat is strongly sloped, the indicator remains out of range, or the restraint will not install tightly.
Get the setup checked if:
- Your newborn’s head repeatedly falls forward into a chin-to-chest position.
- The recline indicator remains outside the approved range after installation.
- The seat moves more than 1 inch at the belt path.
- You cannot tell which recline range applies to your child.
- The manual’s towel, noodle, base, or recline instructions are unclear for your vehicle.
NHTSA provides a Car Seat Finder and access to car seat inspection resources, including help from certified technicians in many communities.
Note: If your baby was born prematurely or has breathing, muscle-tone, or other medical concerns, ask the pediatrician or hospital care team about car-seat positioning. Do not try to solve persistent breathing or positioning problems with unapproved padding or accessories.
Also pay attention to the difference between a baby turning the head naturally to one side and the whole head slumping forward. HealthyChildren.org guidance specifically warns against a chin-to-chest position that can obstruct a young infant’s airway.
Frequently Asked Questions
What Angle Should a Newborn Car Seat Recline At?
About 45 degrees is a common reference for newborn positioning, but your car seat may specify a different approved range. Use the more reclined setting allowed for your newborn and confirm it with the seat’s own level indicator and instruction manual.
What Is the Acceptable Recline for a Newborn?
The acceptable recline is the newborn position or approved zone specified by your exact car seat. A generic number should never override the indicator. Check the angle on level ground after the seat is fully tightened, and make sure the baby’s head does not slump forward.
Is It Okay for a Newborn’s Head to Be Tilted in a Car Seat?
A newborn may naturally turn or lean the head slightly to one side, but the head should not repeatedly slump forward into a chin-to-chest position. If it does, check the recline, baby’s position, harness fit, and any manufacturer-approved insert before traveling again.
Should a Car Seat Be at a 45 Degree Angle?
Not every car seat must be set to exactly 45 degrees. That angle is commonly associated with newborn positioning, but the manufacturer determines the allowed recline range. Follow the seat’s indicator and manual, especially when the restraint provides different settings for different children.
Can I Use a Rolled Towel or Pool Noodle Under an Infant Car Seat?
You can use a rolled towel or pool noodle only if the instructions for your exact car seat and installation method allow it. Some models permit one or both methods, while others prohibit them. Use the built-in recline system first whenever the manual requires it.
What Should I Do If My Baby’s Head Keeps Falling Forward?
Stop and check the rear-facing recline angle, baby’s back and bottom position, harness fit, and any insert required by the manufacturer. Do not add an aftermarket head support. If the problem continues despite a correct installation, have a certified technician check the seat.
Conclusion
The correct infant car seat recline angle is the one approved for your child by the seat manufacturer. Use the built-in indicator on level ground, recheck it after tightening, and watch for forward head slump. If the seat cannot stay both correctly reclined and securely installed, have a certified technician check the setup instead of improvising.
Sources
- National Highway Traffic Safety Administration: Rear-facing installation, recline indicators, tightening, and the 1-inch movement check.
- American Academy of Pediatrics: Infant semireclined positioning, approximately 45-degree guidance, and airway considerations.
- HealthyChildren.org: Correct installation angle and avoiding chin-to-chest head slump.
- NHTSA Car Seat Finder: Car-seat selection and access to certified installation-check resources.
- Chicco Fit3x Instruction Manual: Model-specific restriction against using a pool noodle or towel to raise that car seat.