When it comes to nail trimming, knowing the do’s and don’ts can make all the difference in ensuring a safe and effective experience. Using the right tools is vital, as is maintaining cleanliness throughout the process. You’ll want to master the proper trimming technique while being aware of common mistakes that can lead to painful mishaps. Understanding the nuances of care after trimming can also enhance the health of your nails. Let’s explore these essential aspects further.
Choosing the Right Tools for Nail Trimming
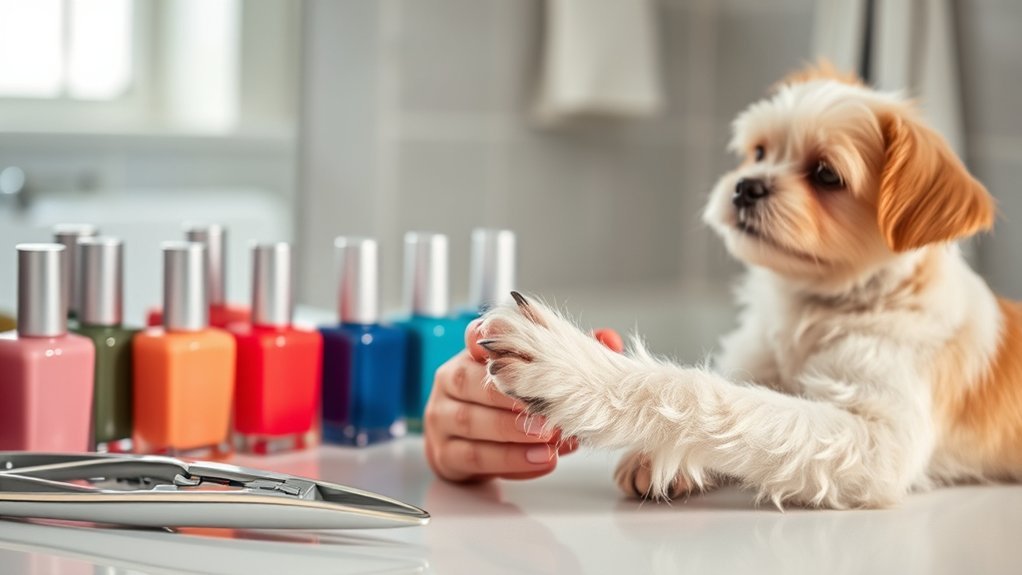
When you’re preparing to trim your nails, choosing the right tools is vital for achieving a clean and effective result. Start with a high-quality pair of nail clippers or scissors; they should be sharp and specifically designed for nail care.
If you prefer a more precise approach, opt for a glass or crystal nail file to shape your nails smoothly without causing splits. For hangnails or stubborn bits, a cuticle pusher and nippers can help, but use them cautiously to avoid injury.
Make sure your tools are comfortable to hold, allowing you to maneuver easily. Finally, keep your tools organized and easily accessible to streamline your nail-trimming routine.
With the right tools, you’ll guarantee a professional-looking finish every time.
The Importance of Cleanliness
Maintaining cleanliness during the nail trimming process is essential not only for hygiene but also for achieving ideal results. A clean workspace and tools can prevent infections and guarantee smooth trimming. Here are some key points to reflect on:
| Aspect | Importance | Best Practice |
|---|---|---|
| Tools | Reduces risk of infection | Sterilize before use |
| Work Surface | Prevents contamination | Disinfect before trimming |
| Hands | Minimizes bacteria spread | Wash and dry thoroughly |
| Nail Clippings | Avoids clutter and mess | Dispose in a sealed bag |
| Frequency | Guarantees ongoing hygiene | Clean tools after each use |
Trimming Technique: What to Do
To achieve clean and precise nail trims, start by positioning the nail clippers or scissors at the appropriate angle.
Hold the clipper parallel to the nail, ensuring that you can see the nail bed clearly. Trim only the white part of the nail, avoiding any areas that appear pink, as this indicates the quick—a sensitive area containing blood vessels.
Use smooth, deliberate motions to prevent fraying. After each cut, check for any sharp edges and file them down gently to create a smooth finish.
Maintain a steady grip, and if you’re trimming a pet’s nails, keep them calm and still. Remember to reward them afterward to create a positive experience for future trims.
Avoiding Common Mistakes
Although trimming nails may seem straightforward, many people make common mistakes that can lead to discomfort or injury.
First, avoid cutting nails too short; this can cause pain and increase the risk of infection. Instead, aim to trim just above the quick, the pink area of the nail.
Next, don’t use dull clippers or scissors, as they can crush rather than cut the nail. Keep your tools clean and sanitized to prevent bacteria buildup.
Also, don’t forget to trim in a straight line, which helps prevent ingrown nails.
Finally, resist the urge to rush the process; take your time to guarantee clean, precise cuts.
Following these guidelines will help you maintain healthy nails and avoid unnecessary issues.
Frequency of Nail Trimming
To maintain healthy nails, it’s essential to understand their growth rates and how they can vary with the seasons.
Generally, nails grow faster in warmer months, so you might need to trim more frequently during this time.
Keeping an eye on their length will help you determine the best schedule for nail maintenance.
Nail Growth Rates
Nail growth rates can vary considerably from person to person, but on average, fingernails grow about 1/8 inch (3 mm) per month. This means you’ll likely need to trim your nails every 3 to 4 weeks to keep them at a manageable length.
Factors such as age, diet, and overall health can influence how quickly your nails grow. For instance, younger individuals often experience faster growth rates.
To maintain ideal nail health, pay attention to any changes in growth speed, as this could indicate underlying health issues. Regularly assess your nails and adjust your trimming schedule accordingly.
Keeping your nails trimmed not only enhances appearance but also helps prevent painful breaks and tears.
Seasonal Trimming Needs
As you monitor your nails’ growth, it’s important to recognize that your trimming needs may vary with the seasons.
During warmer months, increased humidity and activity can accelerate nail growth, so you might find yourself trimming every two to three weeks.
Conversely, in colder months, your nails may grow more slowly due to lower moisture levels, allowing for trimming every three to four weeks.
Keep an eye on the condition of your nails as well.
Dry, brittle nails may break, requiring more frequent trimming, while healthy nails can maintain longer lengths without issue.
Always adjust your trimming schedule based on your lifestyle and nail health for best results.
Staying consistent with your trimming routine helps maintain both appearance and overall nail health.
Caring for Your Nails Post-Trimming
Once you’ve trimmed your nails, caring for them is essential to maintain their health and appearance.
You’ll want to moisturize regularly to prevent dryness, avoid harsh chemicals that can weaken them, and protect them from trauma to guarantee they stay strong.
Implementing these practices will help you enjoy beautiful, resilient nails.
Moisturize Regularly
Regularly moisturizing your nails and cuticles is essential for maintaining their health and appearance after trimming. Hydration helps prevent dryness and brittleness, which are common issues following nail care.
Choose a high-quality cuticle oil or a rich hand cream to nourish the area. Apply the moisturizer daily, focusing on your cuticles and the skin surrounding your nails. This practice not only enhances the look of your nails but also promotes growth and resilience.
Remember to massage the product into your nails and cuticles gently; this stimulates blood circulation, further supporting nail health. Consistency is key, so make moisturizing a part of your daily routine, especially after washing your hands or using hand sanitizers.
Your nails will thank you!
Avoid Harsh Chemicals
Harsh chemicals can wreak havoc on your freshly trimmed nails, so it’s important to be mindful of the products you use.
Avoid nail polishes and removers containing formaldehyde, toluene, and dibutyl phthalate, as these substances can weaken your nails and lead to peeling or splitting.
Opt for gentle, acetone-free removers and natural polishes that prioritize nail health.
Additionally, stay clear of household cleaning products that contain strong chemicals; instead, use gloves to protect your nails during chores.
If you’re using any skincare products, make sure they’re free from sulfates and parabens.
Protect From Trauma
To guarantee your nails remain in ideal condition after trimming, it’s essential to protect them from any potential trauma.
Start by avoiding activities that could cause injury, like excessive typing or manual labor, for at least a day post-trim. If you must engage in such tasks, consider wearing gloves to shield your nails from impact.
Additionally, keep your nails dry and clean to prevent infection; moisture can weaken them and increase the risk of breakage. Regularly applying a nourishing cuticle oil will help maintain flexibility, reducing the chance of splits.
Finally, be mindful of how you handle objects; avoid using your nails as tools, as this can lead to unnecessary stress and damage.
When to Seek Professional Help
While many pet owners can confidently trim their pet’s nails at home, there are situations where seeking professional help is crucial.
If your pet shows signs of anxiety, aggression, or fear during nail trimming, it’s best to consult a groomer or veterinarian. Additionally, if you notice any abnormalities, such as splitting, discoloration, or bleeding, don’t hesitate to reach out for professional assistance.
Pets with underlying health issues, like arthritis, may require special techniques to prevent discomfort. If your pet’s nails are excessively long and you’re unsure how to proceed, it’s wise to seek help.
Frequently Asked Questions
Can I Use Regular Scissors for Nail Trimming?
You shouldn’t use regular scissors for nail trimming. They lack the precision needed for clean cuts and can cause splitting or tearing. Instead, opt for nail clippers or dedicated nail scissors for better results.
What Should I Do if I Cut Too Deep?
If you cut too deep, don’t panic; it’s not the end of the world. Apply gentle pressure with a clean cloth, elevate the area, and use a styptic powder to stop the bleeding effectively.
Are Nail Clippers Safe for Pets?
Yes, nail clippers are generally safe for pets when used correctly. Choose clippers designed for their size, avoid cutting too close to the quick, and reward your pet afterward to create a positive experience.
How Can I Tell if My Nails Are Too Long?
You can tell your nails are too long if they extend beyond your fingertips, snag on clothing, or cause discomfort. Regularly check for these signs to maintain proper nail length and prevent potential injury.
Is Nail Trimming Necessary for Children?
Yes, nail trimming’s necessary for children. Keeping their nails short prevents injuries, reduces the risk of infections, and promotes good hygiene. Regular trims also help them develop healthy grooming habits that last into adulthood.
Conclusion
In the end, think of your nails as delicate canvases that deserve your care and attention. By choosing the right tools and mastering the trimming technique, you’re not just preventing pain; you’re crafting a polished look. Picture the satisfaction of smooth, well-groomed nails glistening under the light, reflecting your dedication. Remember to nourish them post-trim, and don’t hesitate to seek professional help if needed. Your nails will thank you, and you’ll feel the difference in your confidence.