Cleaning bottles is like polishing a gem; it requires attention to detail to reveal their true shine. To guarantee your bottles are free from unwanted residue and bacteria, you’ll need a systematic approach. Start by gathering your supplies and preparing to scrub. Each step is crucial, as neglecting any part can lead to lingering odors and germs. Ready to discover the best methods for achieving sparkling clean bottles?
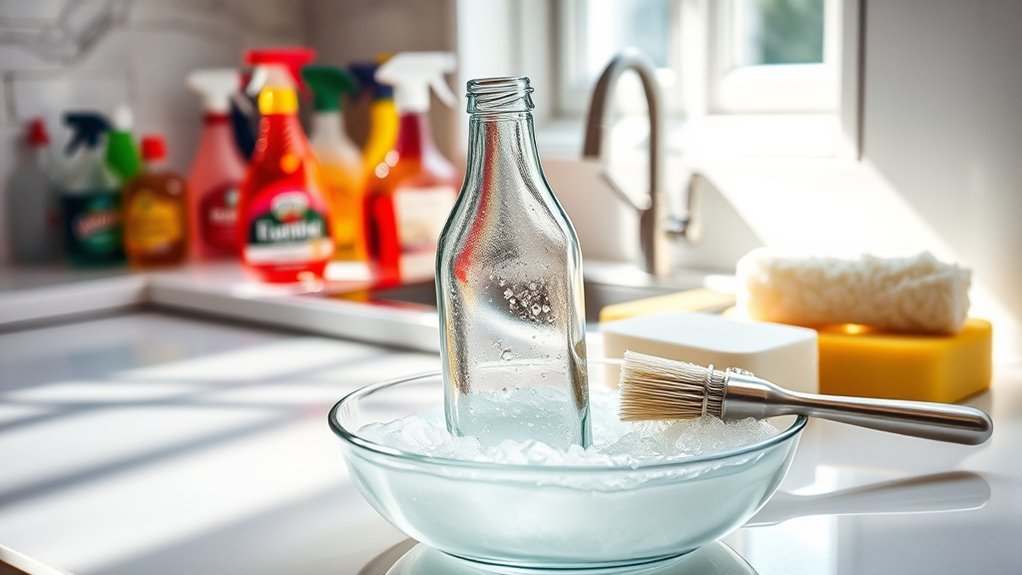
Gather Your Cleaning Supplies
To effectively clean your bottles, you need to gather a few essential supplies. Start with a bottle brush, which is perfect for reaching all the nooks and crannies, especially in narrow-necked bottles.
Next, choose a suitable cleaning solution; for glass bottles, a mild dish soap works well, while stainless steel may require a specialized cleaner. Don’t forget a sponge or cloth for external cleaning. You should also have hot water on hand to enhance cleaning power.
Choose the right cleaning solution for your bottles: mild dish soap for glass and specialized cleaner for stainless steel, plus hot water for extra power.
Consider the materials of your bottles, as different materials may necessitate specific cleaning methods.
Establish a cleaning frequency based on how often you use your bottles; daily use might mean cleaning every few days, while less frequent use could allow for weekly cleaning.
Rinse the Bottle Thoroughly
Rinsing your bottle thoroughly is crucial to remove any leftover soap or residue that could affect the taste of your next drink.
Use warm water to guarantee a more effective rinse, as it helps dissolve any lingering particles.
Employ a swishing technique to make certain every corner of the bottle gets cleaned and rinsed properly.
Importance of Rinsing
While you might think that a quick rinse will suffice, thoroughly rinsing your bottles is essential for maintaining both hygiene and the quality of your beverages.
Proper rinsing not only protects your health but also enhances the taste of your drinks. Here are four key reasons why rinsing is crucial:
- Eliminates Residues: It removes leftover liquids that can harbor bacteria.
- Preserves Flavor: Incomplete rinsing can lead to lingering tastes from previous contents.
- Promotes Health Benefits: Clean bottles reduce the risk of illness caused by contaminants.
- Reduces Environmental Impact: Regularly rinsed bottles last longer, minimizing waste.
Rinsing Techniques
After understanding the importance of rinsing, let’s explore effective techniques for rinsing your bottles thoroughly.
Start by filling your bottle halfway with clean water. Secure the cap tightly and shake it vigorously for about 15 seconds. This action helps dislodge any residue clinging to the sides.
Next, pour out the water and inspect the interior; if you still see remnants, repeat the shaking process.
For the best rinsing practices, consider using a bottle brush for hard-to-reach areas, especially in narrower bottles.
Finally, verify you rinse multiple times until the water runs clear, confirming that all soap and debris are gone.
Following these effective rinsing methods guarantees that your bottles are clean and ready for use.
Water Temperature Considerations
When it comes to rinsing your bottles thoroughly, the temperature of the water you use plays a crucial role.
Choosing the right water temperature can make a significant difference in cleaning efficiency. Here are some considerations for hot vs cold water:
- Hot Water: It helps dissolve residues and sanitizes surfaces effectively.
- Cold Water: It’s useful for rinsing off soap to prevent any residual taste.
- Ideal Temperatures: Aim for warm water, around 120°F (49°C), which balances cleanliness and safety.
- Safety Note: Always verify the water isn’t too hot to avoid damaging your bottles or risking burns.
Choose the Right Cleaning Solution
Choosing the right cleaning solution is essential for effectively sanitizing your bottles without damaging them.
Start by considering eco-friendly solutions, as they’re less harmful to both your health and the environment. Look for biodegradable dish soaps or vinegar, which are great natural alternatives.
Baking soda can also be a powerful ally in removing stubborn stains and odors. When selecting a product, make certain it’s safe for the material of your bottle, whether it’s glass, plastic, or stainless steel.
Check labels for any harsh chemicals that could cause damage. If you prefer store-bought options, choose those labeled as gentle or specifically designed for bottle cleaning.
With the right solution, you’ll make certain your bottles remain clean and safe for use.
Scrub the Interior
Start by grabbing a bottle brush or a flexible cleaning tool to effectively scrub the interior of your bottles.
Choose the right scrubbing techniques based on the interior materials of your bottles to guarantee thorough cleaning without damage.
Here’s how to scrub effectively:
- Wet the Brush: Dip your brush in soapy water, allowing it to soak in your cleaning solution.
- Scrub the Sides: Insert the brush and scrub the interior walls using circular motions to remove residue.
- Focus on the Bottom: Use the brush’s tip to reach and clean the base, where grime tends to accumulate.
- Rinse Thoroughly: After scrubbing, rinse the bottle with clean water to remove any soap and debris.
Following these steps will help you maintain clean, safe bottles.
Clean the Cap and Neck
To guarantee your bottles are truly clean, don’t forget to focus on the cap and neck.
Start by using warm soapy water to scrub these areas, as they often collect residue and germs.
After cleaning, rinse thoroughly to remove any soap, leaving your bottles ready for use.
Use Warm Soapy Water
While it might seem straightforward, cleaning the cap and neck of your bottle with warm soapy water is essential for maintaining hygiene. The warm water benefits include effectively dissolving residue and killing bacteria. Choose soap types that are gentle yet effective, like dish soap or biodegradable options.
Follow these steps:
- Fill a bowl with warm water and add a few drops of your chosen soap.
- Dip a cloth or sponge into the soapy water, ensuring it’s well-saturated.
- Wipe the cap and neck thoroughly, paying attention to crevices where dirt can hide.
- Rinse the cap and neck under warm running water to remove any soap residue.
This method keeps your bottle clean and safe for use.
Rinse Thoroughly After Cleaning
After you’ve thoroughly cleaned the cap and neck of your bottle, it’s vital to rinse them properly. Rinsing removes any remaining soap or cleaning residue that could affect your drink’s taste. Aim to rinse at least twice to guarantee cleanliness. Use cool water for a revitalizing finish, but if you’ve used strong cleaners, hot water may be better. Here are some effective rinsing methods you can try:
| Rinsing Method | Description | Frequency |
|---|---|---|
| Simple Rinse | Just run water through the cap and neck. | After each use |
| Soak and Rinse | Submerge in water, then rinse. | Weekly |
| Vinegar Rinse | Use vinegar for a deeper clean. | Monthly |
| Dishwasher Rinse | Place in the dishwasher. | As needed |
| Boiling Water Rinse | Use boiling water for sterilization. | Before long-term storage |
Choose the method that suits your needs!
Use Baking Soda for Stubborn Odors
Baking soda is a powerful ally when tackling stubborn odors in bottles. Its natural properties make it an excellent choice for effective odor removal.
Here’s how you can harness the baking soda benefits:
- Add 2 tablespoons of baking soda to the bottle.
- Pour in warm water, filling the bottle halfway.
- Seal the bottle and shake vigorously for about 30 seconds.
- Let the solution sit for at least 15 minutes to work its magic.
Afterward, you’ll notice that unpleasant smells have noticeably diminished. Baking soda absorbs and neutralizes odors, leaving your bottles fresh and clean.
This simple method not only enhances your cleaning routine but also guarantees your bottles remain odor-free for future use.
Rinse Again With Hot Water
Rinsing your bottles again with hot water is an essential step to guarantee all cleaning agents and residues are completely removed.
Hot water benefits include its ability to dissolve and loosen any remaining soap or cleaning solution, ensuring you don’t ingest harmful chemicals.
To do this, fill your bottle with hot water, covering the areas you’ve just cleaned. Swirl the water around for a few seconds, then pour it out.
Repeat this process at least once or twice, depending on how soapy the water looks after the first rinse. Regular rinse frequency not only enhances cleanliness but also prolongs the life of your bottles.
Make this step a habit to keep your bottles safe and fresh for every use.
Air Dry or Use a Clean Towel
Once you’ve thoroughly rinsed your bottles, it’s important to guarantee they dry properly to prevent any lingering moisture that can lead to mold or bacteria growth.
Ensure your bottles dry completely after rinsing to prevent mold and bacteria growth.
You can choose between air drying and towel drying, each with its benefits.
Here are some tips for both methods:
- Air Drying Benefits: It allows bottles to dry naturally, reducing the risk of lint from towels.
- Ensure Good Airflow: Place bottles upside down on a clean drying rack to promote airflow.
- Use a Clean Towel: If towel drying, choose a lint-free towel to avoid residue.
- Towel Drying Techniques: Gently wipe the interior and exterior, ensuring no moisture remains before storing.
Pick the method that works best for you, and enjoy clean, dry bottles!
Regular Maintenance Tips
While keeping your bottles clean is essential, regular maintenance can prevent buildup and extend their lifespan.
Start by establishing a maintenance schedule that includes regular cleaning sessions. Aim to wash your bottles after each use, especially if they contain liquids like juice or smoothies that can leave residues. Use warm, soapy water and a brush to scrub the interior thoroughly.
Additionally, inspect your bottles for any signs of wear or damage. If you notice scratches or cracks, it’s time to replace them, as these can harbor bacteria.
Every month, consider deep cleaning your bottles using a mixture of vinegar and baking soda to eliminate stubborn odors and stains.
Frequently Asked Questions
How Often Should I Clean My Bottles?
You should clean your bottles daily for ideal bottle maintenance. Regular cleaning prevents bacteria buildup, ensuring your beverages stay fresh. Develop a routine to make cleaning effortless, keeping your bottles in top condition for every use.
Can I Use Vinegar Instead of a Commercial Cleaner?
Absolutely, you can use vinegar instead of a commercial cleaner! Like a superhero for your bottles, vinegar’s benefits as a natural cleaner effectively eliminate odors and residues, ensuring your bottles stay fresh and safe for use.
Are There Specific Bottles That Require Special Cleaning?
Yes, certain bottles with special materials like glass or stainless steel may need specific cleaning methods. Unusual bottle shapes can also require unique approaches to guarantee you thoroughly clean every nook and cranny effectively.
What Should I Do if My Bottle Retains Odors?
If your bottle retains odors, mix baking soda and lemon juice with water. Pour the mixture into the bottle, shake it well, and let it sit for a few hours before rinsing thoroughly.
Can I Put My Bottle in the Dishwasher?
About 70% of reusable bottles are dishwasher safe, but check your bottle’s materials first. Plastics may warp, while stainless steel often withstands heat. Always place it securely to avoid damage during the wash cycle.
Conclusion
With your bottles now sparkling clean, imagine the fresh scent of a sunlit kitchen, free from lingering odors and bacteria. As you place your bottles on the drying rack, revel in the satisfaction of knowing they’re ready for your next adventure—whether it’s revitalizing water or your favorite smoothie. Remember, a little regular maintenance keeps this cycle of cleanliness going, ensuring every sip is as pure as the moment you first opened that bottle. Cheers to your health!