Many believe that neglecting pump maintenance can severely impact performance and longevity. However, the truth is that regular cleaning can prevent costly repairs and guarantee efficient operation. By understanding the process and following a systematic approach, you can keep your pump parts in prime condition. Let’s explore the essential steps you need to take to maintain your pump and discover how a thorough cleaning routine can make all the difference.
Understanding the Importance of Cleaning Pump Parts
While you might think that pump maintenance focuses solely on operational efficiency, understanding the importance of cleaning pump parts is essential for prolonging equipment lifespan and ensuring peak performance.
Regularly cleaning your pump components prevents the buildup of contaminants that can lead to corrosion, wear, and ultimately failure. Neglecting this vital task can result in reduced flow rates, increased energy consumption, and costly downtime.
Additionally, clean parts enhance the accuracy of measurements and improve the overall reliability of the system. By implementing a routine cleaning schedule and adhering to manufacturer guidelines, you can maintain ideal functionality and extend the service life of your pumps.
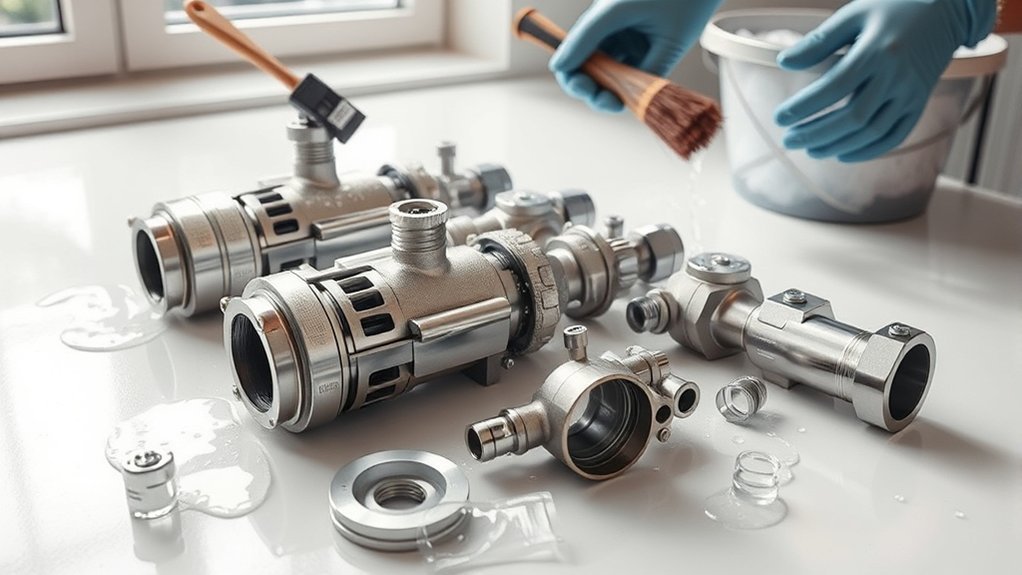
Essential Tools for Cleaning Pump Components
To maintain ideal performance and prolong the lifespan of your pump components, having the right tools for cleaning is essential.
Start with a set of soft-bristled brushes, which effectively remove debris without damaging surfaces. Use a high-quality degreaser to tackle stubborn grease and grime. A pressure washer can be invaluable for larger components, ensuring thorough cleaning.
Begin with soft-bristled brushes for gentle debris removal, then apply a high-quality degreaser for tough grease, and consider a pressure washer for larger parts.
For intricate areas, a toothbrush or similar small brush allows for precision. Don’t forget a microfiber cloth for drying and polishing surfaces. Additionally, safety goggles and gloves should be on hand to protect yourself during the process.
Finally, a bucket for rinsing and a vacuum for debris collection will streamline your cleaning procedure, ensuring efficiency and effectiveness.
Safety Precautions Before You Start
Before you begin cleaning pump parts, make certain you wear appropriate personal protective equipment, including gloves and goggles.
Maintain adequate ventilation in your workspace to avoid inhaling harmful fumes or dust.
Finally, organize your area to minimize hazards and promote safe handling of components.
Personal Protective Equipment
Guaranteeing your safety is essential when cleaning pump parts, as improper precautions can lead to serious injuries.
Start by wearing safety goggles to protect your eyes from splashes and debris. Don’t forget to put on gloves—chemical-resistant ones are ideal if you’re using solvents. A lab coat or coveralls will shield your skin and clothing from hazardous materials. Steel-toed boots are recommended to protect your feet from heavy components.
If you’re working with any sharp or heavy parts, consider using cut-resistant gloves. Ear protection may also be necessary if you’re in a noisy environment.
Finally, make certain your hair is tied back and secure any loose clothing to avoid entanglement. Prioritize these protective measures to maintain a safe working environment.
Ventilation and Workspace Safety
As you prepare to clean pump parts, proper ventilation is essential to minimize exposure to harmful fumes and guarantee a safe working environment. Confirm your workspace is well-ventilated by opening windows or using exhaust fans to promote air circulation.
If possible, conduct the cleaning outdoors or in a designated fume hood.
Before starting, remove any flammable materials and verify all electrical equipment is rated for the environment. Keep a fire extinguisher nearby, and familiarize yourself with its operation.
Wear appropriate PPE, including gloves and goggles, to protect against chemical splashes.
Regularly assess your workspace for hazards and maintain a clutter-free area to prevent accidents. Following these safety measures will help confirm a smooth and safe cleaning process.
Step-by-Step Cleaning Process
To begin the cleaning process, gather all necessary supplies, including cleaning agents and tools.
Next, disassemble the pump components carefully to avoid damage.
Once disassembled, clean and rinse each part thoroughly to guarantee peak performance.
Gather Necessary Supplies
Before diving into the cleaning process, gather the essential supplies you’ll need to effectively clean your pump parts.
Start with a bucket or container for holding the cleaning solution. You’ll require a suitable cleaning agent, often a degreaser or detergent, designed for the specific materials of your pump.
Don’t forget soft brushes or cloths for scrubbing, making sure they won’t scratch surfaces. A pair of gloves will protect your hands from chemicals and grime.
Additionally, have a hose or a pressure washer ready for rinsing, along with a towel for drying.
Finally, make certain you have appropriate safety goggles to shield your eyes.
With these supplies in hand, you’re prepared to clean your pump parts thoroughly and safely.
Disassemble Pump Components
Disassembling pump components is an essential step in the cleaning process, ensuring every part is accessible for thorough maintenance.
Start by disconnecting the power supply to prevent accidents. Use the appropriate tools to carefully unscrew or unfasten any bolts or clamps holding the components together. Keep track of all parts and fasteners; a magnetic tray can be helpful.
As you remove each component, inspect it for wear or damage. Make sure to follow the manufacturer’s guidelines for disassembly to avoid any mishaps. Take note of the assembly order for reinstallation.
Once disassembled, you’ll have a clear view of each part, setting the stage for effective cleaning and ensuring the longevity of your pump.
Clean and Rinse Parts
Begin the cleaning process by carefully scrubbing each disassembled pump part with a suitable cleaning solution.
Use a soft-bristle brush to reach crevices and guarantee thorough coverage. Pay special attention to areas with built-up grime or debris.
Once you’ve scrubbed each component, rinse them under warm water to remove any residual cleaning solution. Ascertain that water flows freely through all openings to prevent clogs.
After rinsing, inspect each part for remaining contaminants; repeat scrubbing and rinsing as necessary.
Allow the components to air dry completely on a clean, lint-free cloth. Make sure no moisture remains, as this could lead to corrosion or malfunction.
Finally, check for any wear or damage before reassembling.
Inspecting Pump Parts for Wear and Tear
Regularly inspecting pump parts for wear and tear is essential to maintaining ideal performance and preventing costly breakdowns.
Start by examining seals and gaskets for cracks or deformities, as these can lead to leaks. Next, check bearings for excessive play or noise—any irregularities here can indicate failure.
Examine seals and gaskets for damage, and check bearings for irregularities to prevent leaks and potential failures.
Look for signs of corrosion on metal surfaces; rust can compromise structural integrity. Inspect impellers for chipping or erosion, which affects efficiency.
Don’t overlook the housing for any signs of impact damage or misalignment. Use a caliper to measure critical dimensions, ensuring they fall within manufacturer specifications.
Document any findings and assess whether parts need repair or replacement. Timely inspections will prolong the life of your pump and optimize its operation.
Reassembling and Testing Your Pump
After thoroughly inspecting and cleaning your pump parts, it’s time to reassemble the unit with precision.
Begin by laying out all components systematically, ensuring you have all necessary tools at hand. Start with the casing, placing the seals correctly to prevent leaks.
Next, insert the impeller, making sure it fits snugly. Secure the motor and align it with the drive shaft. Tighten all screws to the manufacturer’s specifications, as overtightening can cause damage.
Once assembled, connect the pump to a power source and conduct a test run. Monitor for unusual noises or vibrations, which may indicate improper assembly.
Check for leaks around the seals and connections, ensuring everything operates smoothly before returning the pump to service.
Establishing a Regular Maintenance Schedule
To keep your pump operating efficiently and prolong its lifespan, establishing a regular maintenance schedule is crucial. You’ll want to outline the frequency of inspections, cleaning, and parts replacement. A systematic approach guarantees that you catch issues before they escalate.
Here’s a sample schedule:
| Task | Frequency |
|---|---|
| Inspect pump parts | Monthly |
| Clean filters | Bi-weekly |
| Lubricate bearings | Quarterly |
| Replace seals | Annually |
| Review performance | Monthly |
Frequently Asked Questions
How Often Should I Clean Pump Parts for Optimal Performance?
You should clean pump parts every 100 operating hours or at least once a month. Regular maintenance prevents buildup, ensuring peak performance and extends the lifespan of your equipment, keeping it running efficiently.
Can I Use Vinegar or Baking Soda for Cleaning Pump Parts?
Yes, you can use vinegar or baking soda for cleaning pump parts. Vinegar’s acidity helps dissolve mineral deposits, while baking soda effectively tackles grease and odors. Always rinse thoroughly afterward to prevent residue buildup.
What Are Common Signs That Pump Parts Need Cleaning?
When you notice decreased performance, unusual noises, or visible buildup, it’s like a warning light flickering. These signs indicate your pump parts need cleaning to restore efficiency and prevent potential damage, ensuring everything runs smoothly.
Is It Necessary to Disassemble the Entire Pump for Cleaning?
No, it isn’t always necessary to disassemble the entire pump for cleaning. You can often access and clean critical components through inspection ports or removable covers, depending on the pump’s design and the extent of contamination.
Can I Use a Pressure Washer to Clean Pump Parts?
You can’t make an omelette without breaking eggs. Yes, you can use a pressure washer to clean pump parts, but guarantee you avoid damaging sensitive components by using appropriate pressure and maintaining a safe distance.
Conclusion
By regularly cleaning your pump parts, you’re not just maintaining performance; you’re practically giving your equipment a second chance at life. Following the steps outlined guarantees you catch any issues early, reducing the risk of costly repairs down the line. Remember, a clean pump is a happy pump, and with a consistent maintenance schedule, you’ll keep it running like a dream for years to come. Don’t underestimate the power of routine care—it’s the key to longevity.